Looking for a creative way to decorate your dorm room without overspending on trendy pillows? Have no fear, Lifestyle Tries is back to replenish each and every student’s low cravings.
Making handmade pillows is actually not as daunting of a task as it seems and it can be a fun way to personalize any space and make a dorm room feel more like home.
There are two different pillow types included in this DIY. The fringe-lace pillow is a bit more difficult, but the finished product looks store-bought. The patterned-tassel pillow is easier for those who want a less time-consuming DIY but still want something that looks unique.
Required supplies for the fringe-lace pillow include one yard of solid white fabric, one roll of lace trim, white yarn, one roll of rope trim, a hot glue gun or needle and thread, a pencil, a ruler, a 3-by-5 inch piece of cardboard and one 12-ounce bag of polyester fiber pillow filling. This pillow should take around two hours to complete.

All of these supplies can easily be found at Joanne’s Fabric store, Walmart and Michaels.
• Step One: Take the white fabric and fold it in half. Using a pencil and ruler, draw a 12-by-12 inch square. Then, take a pair of scissors and cut the square out.
• Step Two: Sew along three sides of the square, leaving one side open so it can be folded inside out. This step can also be substituted with the use of a hot glue gun.
• Step Three: Fold the pillow case inside out. Then, take the roll of lace trim and cut three strips to the length of the fabric vertically. Glue the first strip to the fabric about 2 inches from the left side. Repeat this step.
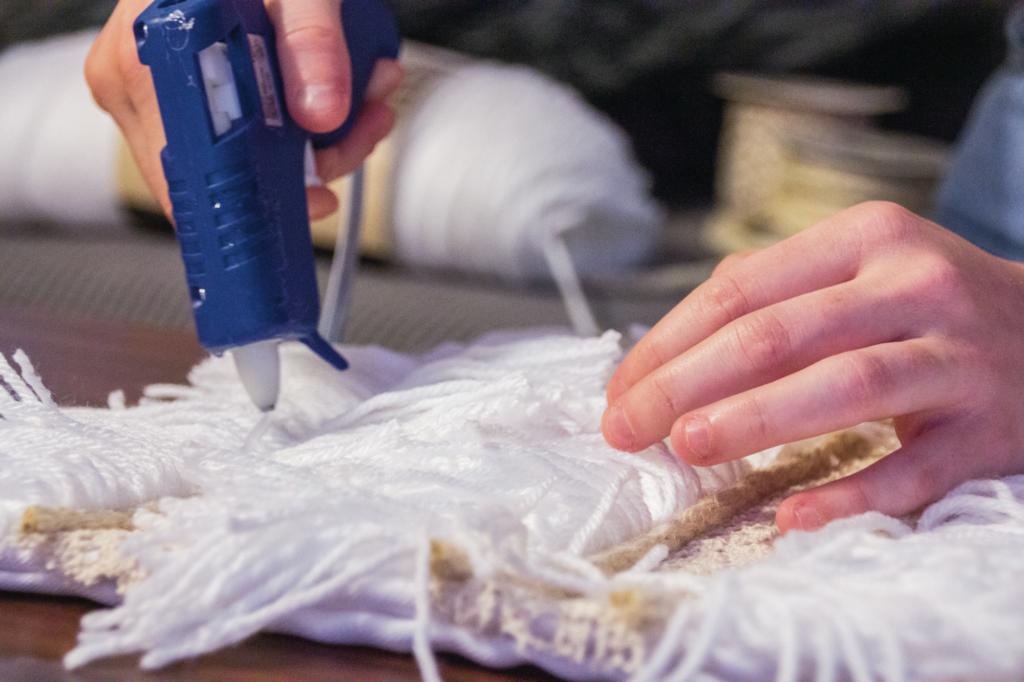
• Step Four: Using the white yarn and 3 x 5 piece of cardboard, wrap the yarn around the longer side 20 times, making sure to cover the cardboard evenly. The yarn should then cover about 2 1/5 inches of the cardboard.
• Step Five: Cut the yarn at both ends of the cardboard and remove the cardboard from between the yarn.
• Step Six: Hot glue a single line next to the lace and place the yarn over the middle of the line. Glue another line above this spot over the yarn. Next, fold it over so the remaining yarn is not covering the lace. Repeat this step until the row is complete.
• Step Eight: Repeat steps four through seven one more time.
• Step Nine: Going the opposite direction, repeat steps four through seven two more times. The middle lace strip should have two rope strands glued on the sides.
• Step 10: Fill the pillow with polyester fiber fill. Finally, glue the final edge together. It may help to fold and safety pin the edges to make sure the side is glued evenly.
Once these steps have been completed, the fringe lace pillow is complete.
Supplies needed to create the pattern-tassel pillow include 1 yard of any patterned fabric, white yarn, a hot glue gun or needle and thread, a pencil, a ruler, a 3-by-5 inch piece of cardboard and one 12-ounce bag of pillow stuffing. This pillow should take about one hour to complete.
• Step One: With the patterned side facing up, fold the fabric together. Then, with a pencil and ruler, draw a 17 x 7 inch rectangle on the fabric and cut away any excess fabric, leaving about 1/2 inch around the edge.
• Step Two: Sew along three sides leaving one 7 inch side open so it can be folded inside out. This step can be completed using a hot glue gun, as well.
• Step Three: Fold the pillow inside out. The patterned side should now be facing out. Now, stuff the pillow with polyester fiber pillow filling and sew or glue the final edge together.
• Step Four: To make the tassels, take the 3-by-5 piece of cardboard and wrap the yarn around the shorter side about 30 times. Next, take scissors and cut the yarn at one end of the cardboard.
• Step Five: Remove the cardboard from between the yarn. Afterward, tie another small strand of yarn around the yarn that is connected. This will create a small ball of yarn with the remaining ends still exposed. Repeat this step until six tassels are created.
• Step Six: Glue the tassels to each corner of the pillow. Then, take the remaining two tassels and glue them in between the others. There should now be three tassels on both ends of the pillow.
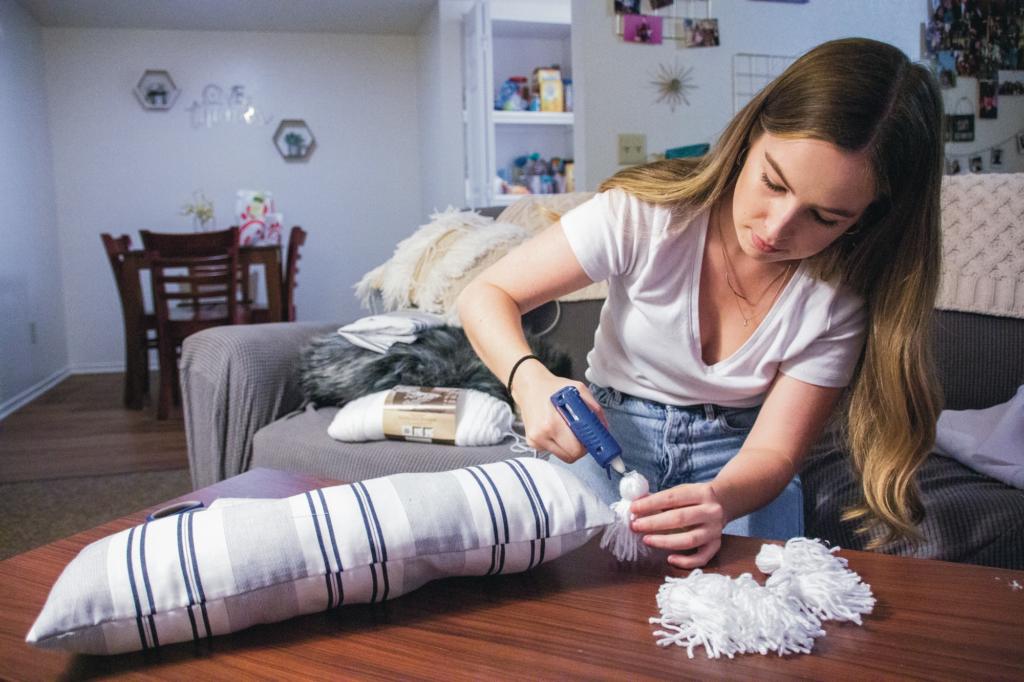
• Step Seven: Take the roll of rope and cut to the length of the pillow vertically. Glue this strip along the lace, on the left side.
Finally, the pillows are complete and ready to liven up a dorm room. If you decide to complete this DIY, be sure to post a picture on Instagram and #Lancercam for a chance to be featured on the @cbulancermedia Instagram page or in the next issue of The Banner. Happy crafting!